Description
Handlebar Install Instructions
$0.00
http://www.hmd520.com/wp-content/uploads/2016/06/HANDLE-BAR-INSTALL-INSTRUCTIONS.pdf
HANDLE BARS- INSTALL
INSTALL TIME: 2 HOURS
PLEASE NOTE: The handle bars do not have cube alignment holes drilled into the bars. We did not drill these holes because of the large degree of positioning of the bars. If preset holes were drilled, your cubes might be tilted too much down or up. Once you have decided on the positioning of the bars, we advise that you tape the area around the bars so you can prevent scratching them. The alignment holes for the cubes are located about 1.5â past the weld, where the 1â hand grips starts. Use a 7/32â drill bit to drill the holes. We recommend a punch to start as a marker for easier drilling.
1. Cover your tank with a cloth or pad to prevent scratching. Remove cube on right handlebar, and grip. Now remove the left cube and grip. Also, remove stereo and cruise controls. You can just let them hang on top of the crash bars.
2. Remove chrome ring around head light. This is held in with push pins, so just tug on it to remove. Remove two bolts at bottom of head light. Next remove 3 bolts under windshield on top of gauges. Remove windshield and place to side.
3. Next, remove the plastic speaker covers. These are also held on with push clips. Use a sharp pick or small screw driver to lift cover off. Remove two bolts behind cover attaching fairing. Next, remove 4 bolts on inner fairing on right, located on outside of fairing. Next, do the same to the left. Outer fairing shell should remove now. From front of bike, push in on fairing and tilt up. The fairing hooks into holes located right below the windshield. You will need to disconnect front speakers and turn signals.
4. Next your will need to remove the gauge bezel. There are 4 bolts to remove the gauge cluster. You must unhook 2 plugs to the radio, and gauge cluster at this time. They are located inside the fairing. Place gauge cluster aside. Also disconnect the wires to the lighter and heated grips at this time. Once the cluster is removed, you will need to remove the inner fairing. The inner fairing is held on by push pins. Just give it a tug, and it should just pop off.
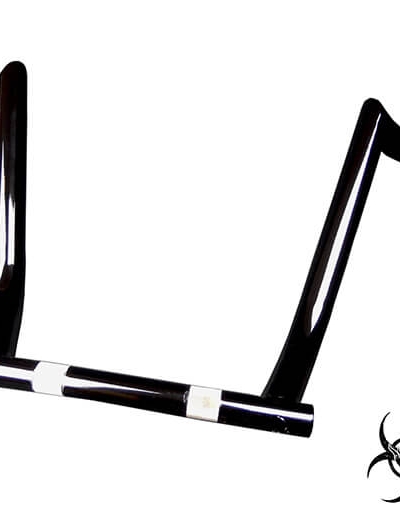
5. Now the riser should be exposed. Remove bolts holding top clamps to risers on. Remove stock bars and place aside. At this time I recommend taping the front of the bars with tape to prevent any scratching while installing the bars. Do not go all the way down to the crossbar. Just tape the straight part of the bar. Install the bars and snug bolts. Sit on the bike and try out the feel of the bars. The bars are designed to have the grips at a slight angle, pointing towards the ground. The pictures are of the highest point you can mount the bars. The bars can go down an additional 2â, which will increase the pullback.
6. Once you have determined your comfort zone on the bars, tighten the bolts on the risers. Go ahead and install the clutch and the brake lever. Mount the cube on the right. There is a small alignment pin under the cube that sits inside the bar. You will need to determine what angle you would like your cube. Keep in mind, if you drill the hole, and decide to lift the bar, or tilt it down, this will change the angle of the cube. So make sure this is the best spot for your bars before you drill. Wrap some tape around the bar, where the alignment pins rests on the bar. Press down. This will leave a small imprint where to drill the hole. Mark the hole and drill. Use a 7/32â drill bit. Mount cubes, and reinstall grips. You can pull additional wire and cable from behind the fairing bracket, if needed. The cables will be snug, but not too tight. If you are worried about the brake line being too tight, we do offer an extended brake line. This is not necessary to install these bars.
NOTE: You can reroute the brake line cable in back of the triple tree, instead of in front, to gain additional brake line.
7. Reinstall the inner fairing, gauge cluster, and bezel at this time.
8. Reinstall all plugs to radio, gauge cluster, lighter, heated grips, speakers, and turn signals. Reinstall fairing. Slightly move outer fairing around until you have aligned holes. Reinstall screws to inner fairing. Reinstall screws behind speaker covers and replace. Reinstall screws above cluster into fairing. Reinstall windshield.
9. Reinstall headlight screws, and replace chrome ring.
10. Tuck the cable and wires under the fairing. Zip-tie the loose cable and wires, to give a clean appearance.
Handlebar Install Instructions
Only logged in customers who have purchased this product may leave a review.


Reviews
There are no reviews yet.